The Challenge
In early 2026, a London-based hardware startup - let's call them BrightEdge - was racing to prepare for a major investor demo. They had a working electronic prototype on a breadboard, but no physical enclosure. Their pitch was in less than a week.
Traditional injection moulding? That would take 4–6 weeks and cost upwards of £3,000 for tooling alone. CNC machining was faster but still a 10-day turnaround. They needed something they could hold in their hands within 48 hours.
The Solution
BrightEdge's lead engineer uploaded their enclosure design to Instant 3D Prints on a Monday morning. The design consisted of three interlocking parts: a main body, a removable lid with ventilation slots, and an internal bracket to hold the PCB in place.
Material Selection
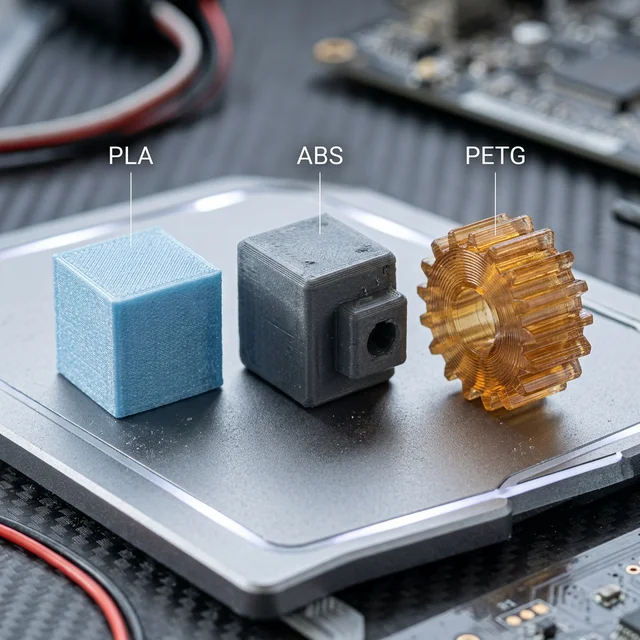
After a quick consultation with our team, they went with ABS for the main body (strong, heat-resistant, and easy to sand for a smooth finish) and PETG for the ventilated lid (slight translucency made it easy for investors to see the LED indicators inside).
Timeline
| Day | Activity | Status |
|---|---|---|
| Monday AM | Files uploaded, material selected, order placed | ✓ Complete |
| Monday PM | Print started on professional FDM machines | ✓ Complete |
| Tuesday AM | Prints completed, quality checked, dispatched | ✓ Complete |
| Wednesday AM | Parts received, assembled with electronics | ✓ Complete |
The First Iteration
When the parts arrived on Wednesday, the team assembled the enclosure with their PCB. Almost everything fit perfectly - except one issue. The internal bracket was 0.3mm too tight on one side, causing the PCB to sit at a slight angle.
Rather than starting from scratch, BrightEdge's engineer tweaked the CAD file, adjusting the bracket dimensions, and uploaded the revised part that same afternoon.
Key insight: This rapid iteration cycle is something injection moulding simply cannot offer. A mould change would cost hundreds and take days. A revised 3D print costs a few pounds and arrives the next day.
The Second Iteration
The corrected bracket arrived on Thursday morning. It slotted in perfectly. The team spent Thursday afternoon sanding the ABS body with fine-grit sandpaper and applying a light coat of filler primer to achieve a smooth, professional finish.
By Friday morning, they had a fully assembled, polished prototype that looked and felt like a pre-production unit.
The Result
BrightEdge walked into their investor meeting on Friday with a physical product in hand - not a render on a screen, not a cardboard mock-up, but a real, tangible prototype that investors could pick up, examine, and interact with.
- Total cost: Under £45 for all printed parts (including the revised bracket)
- Total time: 48 hours from upload to final assembled prototype
- Compared to injection moulding: Saved approximately £3,000+ and 5 weeks
- Outcome: The pitch went well. BrightEdge secured their seed funding round.
Why 3D Printing Works for Prototyping
This case study highlights the core advantages of 3D printing in a prototyping workflow:
- Speed - Parts in days, not weeks. Iteration in hours, not cycles.
- Cost - No tooling, no minimum order quantities. Pay for what you print.
- Flexibility - Change a dimension, tweak a fitment, add a feature - and reprint without penalty.
- Fidelity - Modern FDM and SLA printers produce parts good enough for investor demos, user testing, and even early sales.
Working on a prototype? Upload your CAD file and get an instant quote. We print and ship within 2–3 working days - faster if you're in a rush. Just let us know.