You've designed the perfect part, exported the file, and you're ready to order. But when you upload it, something's off - the print fails, the dimensions are wrong, or the surface finish isn't what you expected. Sound familiar?
In most cases, the issue isn't with the printer - it's with the file. Here's how to prepare your 3D model so it prints perfectly, first time.
1. Make Your Model Watertight
A watertight (or manifold) model is one with no gaps, holes, or missing faces in the mesh. If your model isn't watertight, slicing software won't know what's "inside" and what's "outside," leading to unpredictable results.
Quick check: In most CAD software, you can run a mesh analysis or "check for errors" function that will highlight non-manifold edges, open boundaries, and flipped normals.
Common fixes:
- Fill holes - Most mesh repair tools can automatically close small gaps
- Remove internal geometry - Delete any floating faces or intersecting bodies inside your model
- Unify normals - Make sure all face normals point outward
2. Check Your Dimensions
One of the most common issues we see is models exported in the wrong units. A part designed in inches but exported as millimetres will be 25.4× too small. Always double-check:
- The units in your CAD software match the units you intend
- The overall dimensions match your expectations when you preview the file
- Wall thicknesses are at least 1mm (thinner walls may not print reliably)
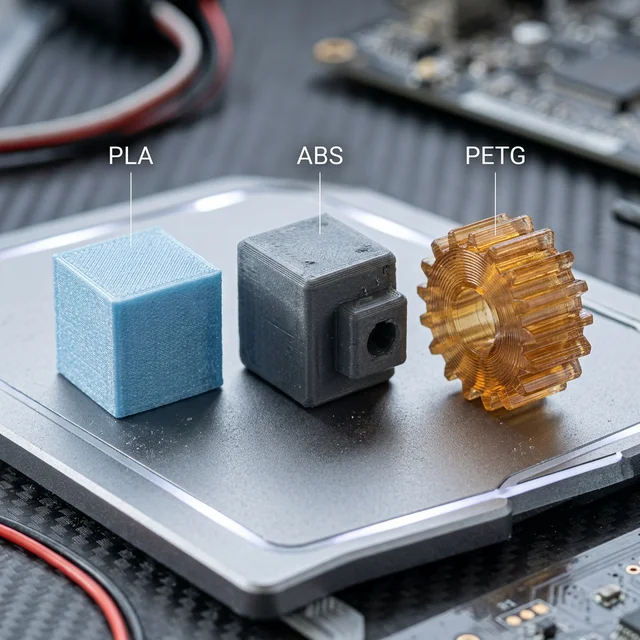
3. Choose the Right File Format
We accept .STL, .OBJ, and .3MF files. Here's when to use each:
- STL - The most universal format. Works with everything, but doesn't carry colour or texture data
- OBJ - Supports colour and textures, useful if you're ordering a multi-colour print
- 3MF - A modern format that packages mesh data, materials, and metadata in one file. Increasingly the best option
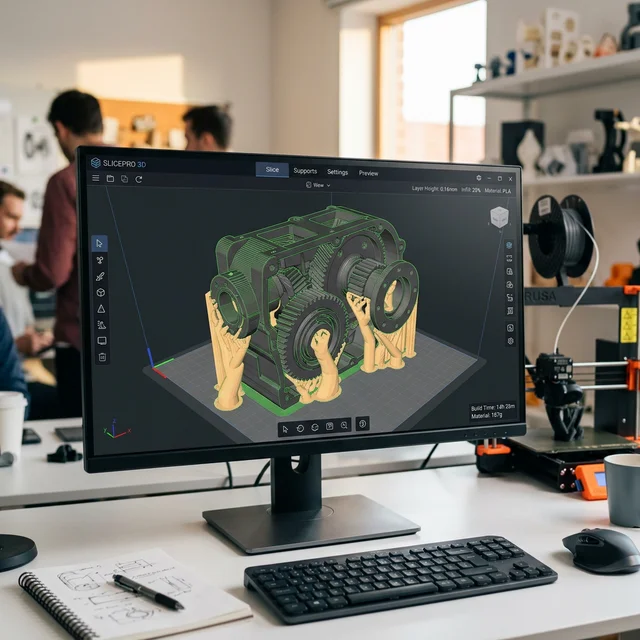
4. Set Appropriate Resolution
When exporting an STL, you'll often see a "resolution" or "deviation" setting. A higher resolution means more triangles, smoother curves, and larger file sizes.
For most prints, a deviation of 0.01–0.02mm is plenty. Going much finer adds file size without visible benefit. Going too coarse (0.1mm+) will produce visible faceting on curved surfaces.
5. Position and Orient Thoughtfully
While our team handles slicing and orientation for the best results, designing with print orientation in mind helps:
- Minimise overhangs - Features that stick out at more than 45° from vertical may need supports
- Flat base - A flat bottom surface improves bed adhesion and print stability
- Detail placement - Put fine details facing up or sideways, not on the bottom (first) layer
Not sure? Just upload your file as-is. Our team will review the orientation and let you know if anything needs adjusting before we print.